As a utility vehicle known for its reliability and overall quality, a review of the Honda Pioneer 700 shows it certainly lives up to the reputation that Honda UTVs have built for themselves through the years.
But as those famous lyrics go, “every rose has its thorn”.
This is true for the Pioneer 700 as despite its standing as one of the best UTVs for the money across the industry, it does suffer from some recurring problems that drive owners crazy.
There are seven common Honda Pioneer 700 problems that tend to recur in this model, including:
- Difficulty shifting gears
- Wet clutch problems
- Excessive squeaking and rattling
- Excessive heat in the cab
- Engine overheating
- Power steering failure
- Roof leaking
This guide will detail each problem along with proven fixes for all of them.
Shifting Problems
Shifting problems are the most common issue you’ll run into as an owner of a Pioneer 700 or 700-4.
These shifting issues include:
- The vehicle seemingly stuck in a certain gear
- Inability to shift to a certain gear in automatic or manual mode
- Paddle shifts not working properly in manual mode
- Gears slipping
Fixes
The good news is there are multiple proven ways to overcome these shifting issues.
Get Oil Flowing Back Into The Clutch-Pack
The most common cause of issues shifting into or out of certain gears is a lack of oil in the clutch-pack.
This happens when the oil within the clutch pack works its way out, causing it to stick when attempting to shift.
If you have both automatic and manual modes, you can usually fix this problem by getting the RPMs up high in first gear and then abruptly letting off the gas pedal while simultaneously shifting up into second gear manually using the paddle shifts.
Be sure and hold the paddle shift in place for a few seconds after making this shift.
You may need to do this a couple of times, during which oil should work its way back into the clutch pack and your Pioneer should go back to shifting as it should.
Check Oil Level
If your Pioneer is slipping out of gear, check your oil level to make sure it’s adequate.
A wet clutch like the one used in the Pioneer models is kept cool by engine oil, and it becomes prone to slippage if your oil levels are low.
A simple oil change may help solve this problem. And remember when refilling or changing the oil to overfill by a fourth to a half-quart in these models, which will also help.
Warm-Up
A simple solution, but try letting your Pioneer 700 warm up for a good five minutes or so before using it.
This generally helps to minimize shifting issues.
Wet Clutch Problems
The Pioneer models are all equipped with wet clutch, which leads to similar problems in the Honda Pioneer 1000 as well.
Wet clutches are ideal for lengthening the life Honda’s unique automotive-style transmissions, but they’re easy to damage if you’re not careful about which gears you operate in and when.
The two main problems caused by the wet clutch are:
- Belt slippage where the you give the Pioneer some gas but it there’s a delay with the belt catching and the machine taking off as it should, which can cause jerky acceleration.
- Hard shifting where it takes more than the normal amount of force to move the gear shift to another setting within the transmission.
There are two ways to overcome this, one being preventative and one being a fix for these issues already occuring.
Fixes
Adjust The Clutch Via The Clutch Adjustment Screw
The best way to overcome hard shifting is to use the clutch adjustment screw to adjust the clutch setting following the steps below.
- Find the clutch adjustment screw just under the seats.
- Loosen the nut that holds the screw in place using a 14mm box-end wrench.
- Using a short-slotted screwdriver, adjust the screw clockwise a full turn.
- Immediately after this full turn, turn the screw back the other way until you feel slight resistance.
- When you feel resistance, turn the screw back clockwise around a quarter to a half-turn.
- Tighten the nut to hold the adjustment screw in place in this position.
You may need to play with the position of the adjustment screw a few times to find the perfect setting, at which point your shifting issues should subside.
Operate In The Correct Gear
It may sound simple, but ensuring you operate in the right gear for the type of driving you’re doing or type of terrain you’re in is crucial to keeping your wet clutch from being damaged.
The clutch in the Pioneer 700 won’t engage in High gear until you hit a speed of at least 5-10 mph, so it won’t get enough oil at lower speeds when not engaged.
This will lead to the clutch overheating and eventually failing.
To avoid this, be sure that you:
- Don’t drive in high gear at prolonged low speeds
- Don’t haul or two heavy loads in high gear
- Do drive in low gear when driving slowly
- Do drive in low gear when hauling or towing heavy loads
Squeaking or Rattling
The engines in the Honda Pioneers are not as quiet as those you’ll find in the best electric UTVs, but they’re known for being quieter than most.
But aside from the engine, the Pioneer 700 is known to make a good bit of squeaking and rattling noise from certain components while driving.
The Squeaking Causes & Fixes
The areas responsible for these common squeaking noises are:
- Motor mounts
- Main body/frame
- Front differential
Motor Mounts
If you hear squeaking at a speed just above idle that disappears as the speed gets past 10+ mph, you should inspect the motor mounts as they’re a common cause of this.
There are three motor mounts that isolate the engine sub-frame to the main body of the Pioneer – one on either side and the third in the back.
Spray each of these motor mounts down with WD-40 Specialist Silicone spray, which should stop the squeaking from this area.
Main Body/Frame
The body and frame is a common source of squeaking as well, which generally happens to the nuts and bolts that hold everything together loosening just the slightest little bit.
Go over every nut and bolt on the frame, body, and seat areas and fully tighten them. Then apply grease to all available fittings and zerks.
Front Differential
The front differential causes squeaking as well, thanks to the four bolts hold it in place.
To stop this, loosen the four bolts in the front differential and pry down on the drive shaft yoke while someone else then re-tightens them as you continue to apply pressure.

The Rattling Causes & Fixes
There are three components that lead to rattling in the Pioneer 700, and fortunately some ways to overcome this.
- Dump bed
- Dump bed tailgate
- Side doors
Dump Bed Rattling
To stop the dump bed from rattling, release it so it tilts up. Locate the strikers on either side that latch it in place.
Loosen the 10mm bolts on each of these strikers and move them up a hair. Then retighten the bolts, which should eliminate the noise.
Dump Bed Tailgate Rattling
The tailgate on the dump bed also rattles, as it doesn’t quite fit as tight as it should when closed.
To stop this, open the dual latches to release the tailgate. You’ll see two small pins on the outside of each latch.
Adjusting these upwards gently using a tool or your fingers should make the tailgate latch tighter when shut.
Side Doors Rattling
To stop the side doors from rattling, open them and remove the bump stop on each.
Using an Allen wrench or similar tool, bend the bottom of the bracket that sits in the bump stop holes outward slightly.
Reinstall the bump stop and slam the doors shut, which should stop the rattling from this area.
Excessive Heat
The cab and seats of the Pioneer 700 are known to get uncomfortably warm while riding, especially during the warmer months.
This problem affects the Pioneer 520 as well, and happens as heat from the radiator vents into the cab area and heat from the engine warms the undersides and backs of the seats.
Fixes
There are some ways to beat the heat in this model though:
- Remove the side doors
- Install a fan under the seats
- Install a heat shield
Remove Side Doors
It’s not ideal, but removing the half side-doors from the Pioneer 700 will increase the air circulation in the cab and cut down on the heat in a big way.
Install A Fan Under The Seats
Installing a little automotive fan that sits under the seats will help to reduce the heat in the cab area as well, and make your legs more comfortable.
Install A Heat Shield
Installing a heat shield is the best way to combat the heat problems.
Design Engineering makes the DEI Honda Heat Shield specifically for Pioneer models, and it only costs around $100.
A good heat shield should knock out about 75% of the heat in the cab and under/behind the seats. It will also cut down on the dust that may circulate in the cab while riding.
Overheating
Like the Honda Pioneers’ closest competitors, the line of Kawasaki Mules, the engines used in these models are some of the best in the biz.
But they do tend to suffer from overheating, which is generally caused by one of the following:
- Temperature sensor setting
- Air bubble in the coolant system
- Blown head gasket
Causes & Fixes
Temperature Sensor
The same problem that affects the Pioneer 500 is that the temperature sensor is factory-set for the fan not to engage until the engine reaches a temp of 215-220 degrees.
Many times when the fan does engage, it’s too to keep the temps in this range and they’ll continue to climb to 230+ degrees, where the engine overheats.
The best way to fix this is to have your ECU tuned by Super ATV, which comes with many benefits including lowering the temperature at which the fan engages to around 190 degrees, which eliminates the problem.
Your other option is to go the route of installing a toggle switch on your dash which can bypass the temperature sensor and give you access to turning on the fan as you please.
Air Bubble In Coolant System
An air bubble is prone to forming in your Pioneer’s coolant system any time the engine overheats.
When an air bubble forms, it will prevent coolant from being pumped properly, leading to the radiator staying cool and the engine overheating.
The only way to eliminate an air bubble from your coolant system is to follow a process for “burping” or “bleeding” the air from the radiator fill area.
While doing this, if you see excessive bubbling from the radiator fill that won’t subside as it should during this process, you’ve likely blown a head gasket.
Blown Head Gasket
Head gaskets can blow any time the engine overheats. When one blows, it then leads to an annoying cycle of more overheating.
Grab you a head gasket test kit to confirm whether this is your problem, and replace the blown head gasket if so.
Electric Power Steering Issues
Honda issued two separate power steering recalls from 2020 – 2021 on around 120,000 Pioneer 700 and Pioneer 1000 models sold between 2017 and 2020.
These recalls focused around units that were equipped with power steering, and had the potential to have too much play in the steering or lose control of the steering due to a defect with the Lower Steering Joint B.
This obviously posed a crash and injury threat, and there were multiple reported cases of that happening.
Fix
Owners of these models were strongly advised to have their dealers inspect their Pioneer to determine if a new Lower Steering Joint B or a yoke joint for the steering shaft assembly needed to be installed.
If you have a Pioneer model that may be affected and haven’t had this checked out yet, you probably should. Inspection and repairs should be covered by Honda under the recall.
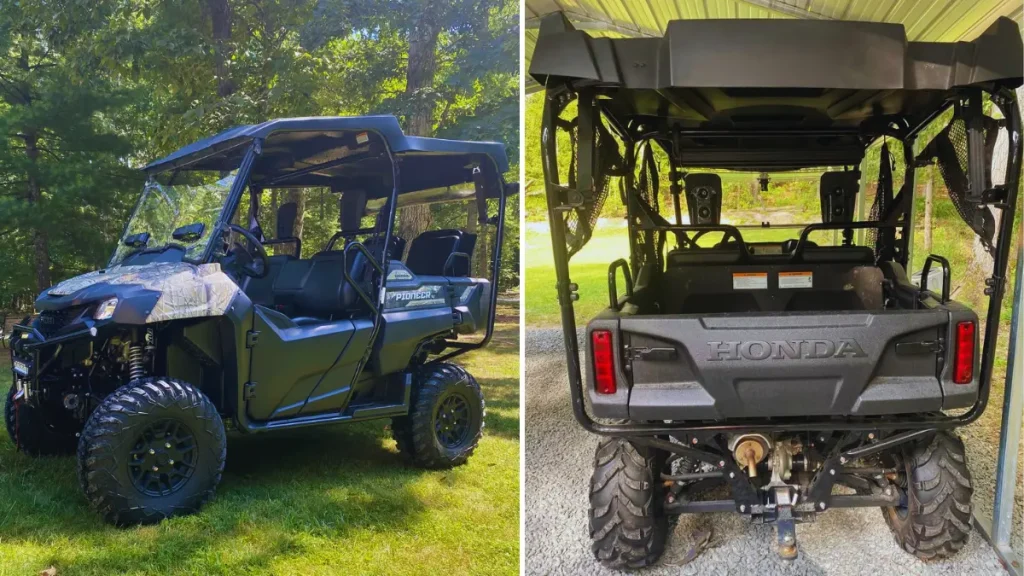
Plastic Roof Leaks Water On You
The stock plastic roof that you can have added as an accessory by Honda has a design flaw that leads to water leaking onto you while driving.
In the middle of the roof, there’s an indented area that will accumulate water when it rains and the Pioneer 700 is not parked under cover.
When you go to accelerate with this pooled water on the roof, it ends up leaking down into your lap over the front edge of the roof as you accelerate.
Fix
The only real fix for this issue depends on whether or not you also have a windshield installed along with your roof.
If so, you can rig up a cheap fix by cutting a pool noodle in half and installing it just over the top of the roll bar where the roof connects with the windshield.
This will plug the gap where the water flows down onto you, directing it over the windshield and down onto the hood of your Pioneer instead.
Conclusion
Despite these common Honda Pioneer 700 problems, this model is still one of the most sturdy and dependable UTVs around.
For more on Pioneers, check out the following before you go:


