The Honda Rancher 420 makes for one of the best ATVs you can buy for the money, but it doesn’t come without its drawbacks.
One of the most common problems experienced with the ever popular Honda Rancher 420 is for the electric shift to stop working when attempting to shift gears up or down.
This guide will explore the following around the Honda Rancher 420 electric shift problems:
- What happens when the electric shift won’t work
- The two main causes of the electric shift not working
- Two proven fixes to get your electric shift working again
Honda Rancher Electric Shift Problems
For those with a Honda Rancher 420 electric shift model rather than a manual foot-shift model, there’s a decent chance you’ll run into issues with the electric shift switches not working when attempting to shift up or down at some point.
Many times when this issue occurs, the shift motor can still be heard trying to complete the shift when the switch or button is pushed, but the actual shifting of gears will not take place.
This is usually accompanied by the display flashing a “–” or the letter of the gear it is stuck in, such as “N” when in Neutral.
These electric shift problems also occur in the Honda Foreman 500.
Cold weather seems to bring the issue on more frequently, but there are two main causes for these problems with the electric shift:
- A faulty shift angle sensor
- A faulty shift motor
Regardless of whether you’re storing your ATV outside or inside in a shed or garage, you should really be covering with one of this year’s best ATV covers when it’s not in use for an extended period.
Covering your ATV will extend the life of many of its internal components, including the angle sensor and the electric shift motor.
Determining Which One It Is
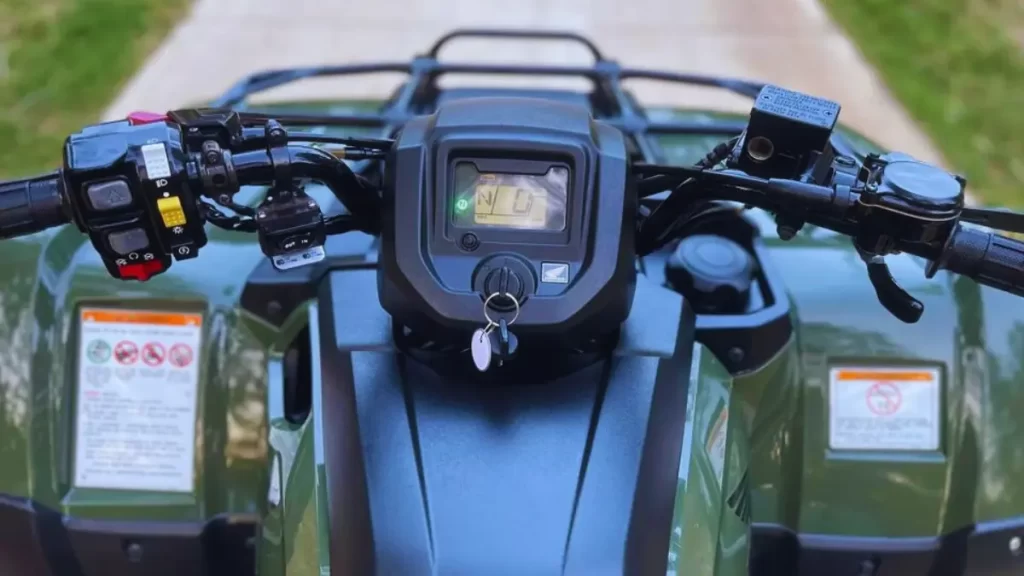
When you are experiencing these electric shift problems, your display will flash the two dashes “–” or the letter of the gear it is stuck in.
You’ll usually see one long flash upon starting your machine up, followed by rapid flashes after that.
To help diagnose the issue, you’ll want to count these rapid flashes, and then refer to the code for that number listed in the Hondamatic Troubleshooting Guide.
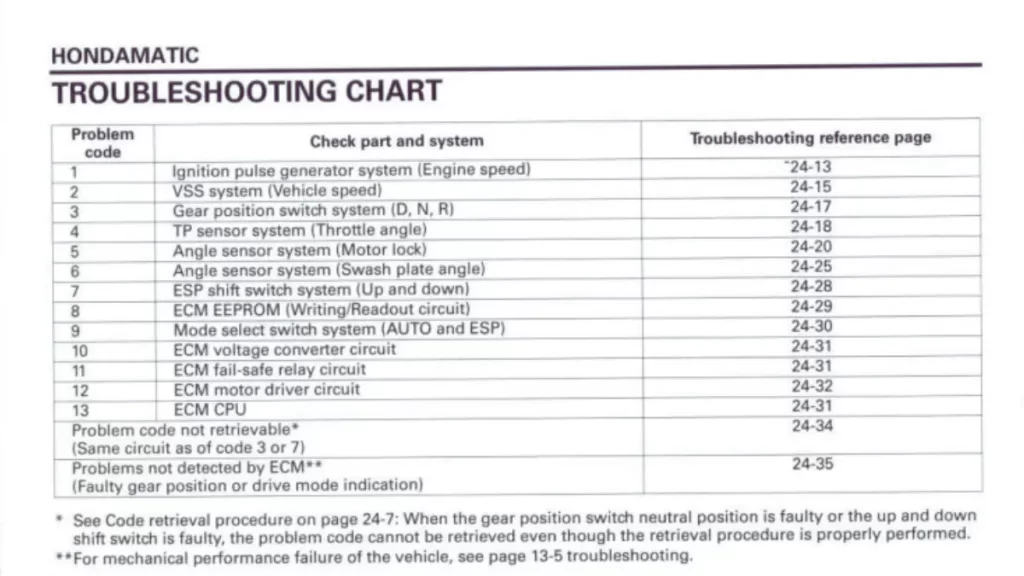
So if you see the “–” or the “N” flash five times, you have problem code #5 on the troubleshooting guide.
You’ll likely find that most often, the code that matches with the number of flashes you see has to do with either the Shift Angle Sensor or the Shift Motor.
Counting the flashes and referring to the guide should help you to determine which one is most likely your issue.
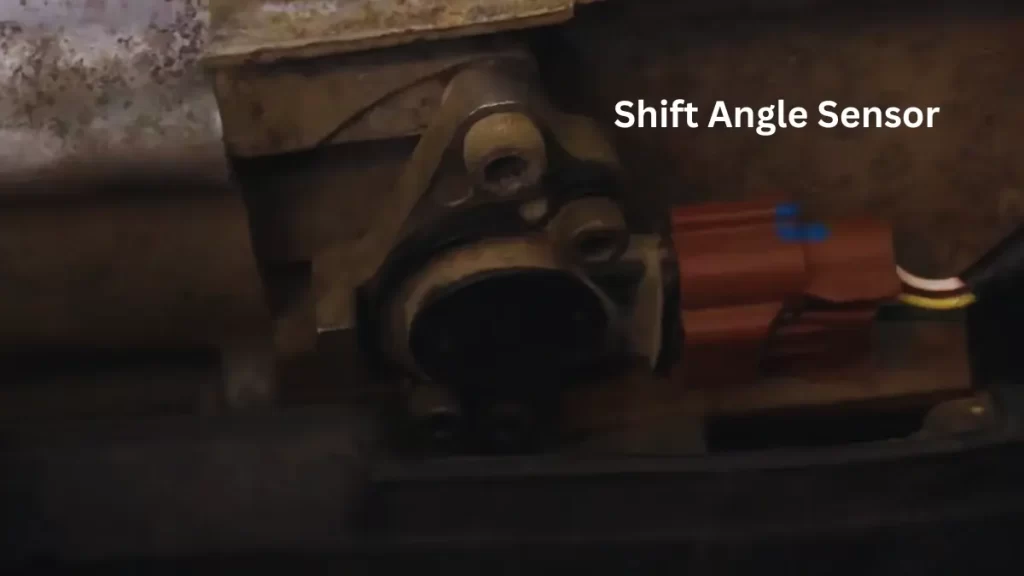
Shift Angle Sensor
The shift angle sensor is responsible for sending a voltage and speed signal to the ECU to control the function of the shift motor and let it know that the transmission has shifted into gear 1, 2, 3, 4, 5, or Reverse.
When it fails, the ECU doesn’t know if your ATV has shifted gears despite the shift motor being sent the signal to shift.
This is what generally results in the display reading “–”, with the ECU thinking it is stuck between gears.
If your angle sensor has gone bad, it will need to be replaced. But it’s not as simple as removing the faulty one and installing a new one.
Installing A New Angle Sensor
There are four steps to installing a new angle sensor:
- Removing the faulty sensor
- Installing the new sensor
- Spring loading the new sensor
- Syncing the ECU with the new sensor
Removing The Old & Installing The New
On a Honda Rancher 420, the angle sensor is located on the left side of the ATV on your engine compartment, right down near where your left foot rests on the footwell.
Depending on the year of your ATV, it may also be located more centrally on the engine compartment, just beneath the seat and beside the shift motor.
The angle sensor plugs into a plate here and is attached to the plate via two bolts. This plate is then attached to the engine compartment by another two bolts.
You’ll likely need to remove your footwell to access the angle sensor.
To remove it, unscrew all four bolts and remove both the angle sensor and plate attached to the engine.
You then attach the new sensor to the plate using the same two bolts.
But before reattaching the angle sensor and plates to the engine with the remaining two bolts, you’ll need to springload it.
Spring Loading The New Sensor
Failure to springload it properly will result in it not working right once reinstalled, so you have to get this part right.
To springload it, turn the angle sensor and plate 90 degrees to the position it normally rests at, with the sensor plug at the top pointing towards the seat of the ATV.
Then push it in and hold it tight, and then turn it clockwise until the sensor plug is on the very right and back at the position it was in before you replaced it.
When doing this, you should feel a slight amount of tension where it wants to turn back the other way.
This is how you know you’re spring loading it properly.
Once in the correct position mentioned above, screw the last two bolts in to reattach it.
Again, if you don’t springload it properly, it won’t display properly. But you’ll find out whether or not you’ve done it right in the next step.
Syncing The ECU & New Sensor
Next, you’ll need to sync the new sensor with your ECU following the steps below.
This can be a lengthy process but must be done for the new angle sensor and ECU to communicate correctly.
- Start the engine and with the machine in neutral, let it idle for 30 seconds.
- Move the gearshift lever to the D position, making sure to check that your display’s gear position indicator shows “D”.
- If it doesn’t show “D”, you’ve installed the angle sensor wrong and will need to re-try.
- If it does show “D” correctly, ride slowly forward for about 5 feet.
- Move the gearshift lever back to Neutral and make sure the gear position on the display shows “N”. If you see “–” displayed instead of N this is okay too.
- Turn off the ignition.
- Move the drive mode select switch to AUTO if not already there.
- Turn the ignition switch ON while pushing in the UP and DOWN shift buttons at the same time.
- Immediately release the UP and DOWN shift buttons, then quickly push and release the shift switches in this order: UP, DOWN, UP. Release each upon pushing it.
- A constant “–” should display on your gear indicator, and you should hear the control motor operation sound when it adjusts the angle sensor.
- Within 5 seconds of the display of the “–” and while the control motor is still operating, move your throttle lever from fully closed to fully opened position, and then back to the fully closed position again.
- When this throttle setting is complete the gear position indicator should change from “–” to the constant display of “N”.
- If you are able, you will want to raise your vehicle with a jack or stand for the following steps.
- Ensure the gear shift lever is in Neutral, the mode select switch is “ESP” and the 2WD/4WD select switch is on “2WD”, then turn off the ignition.
- Push down the UP and DOWN buttons at the same time and turn on the ignition.
- Check and make sure that “N” blinks on the gear position indicator.
- Immediately release both the UP and DOWN buttons, then push them again in this order: UP, UP, DOWN, DOWN. Immediately release each upon pushing it.
- Start the engine and move the gear shift lever to Drive.
- Push the UP shift button 4 times to select the 5th speed. Ensure the gear indicator shows “5” and “–” blinking alternately.
- Slowly move the throttle lever and control the wheel speed to keep the speedometer at 20 – 22 mph.
- When this step is complete, the gear position indicator will change from to a constant display of the “5”.
- Reduce the wheel speed slowly until stopped, move the shift lever to Neutral and turn off the ignition.
- You should be done, but give your Rancher a test ride to ensure the engine and automatic transmission operate normally in all modes including AT, ESP, 2WD, 4WD.
Faulty Shift Motor
If the problem code you have points towards the shift motor, you can either fix it or replace it.
Fixing The Shift Motor
The most common cause of a faulty shift motor is factory grease that was installed on the gears of the shift motor gumming up over time and causing the gears to stick.
To fix this issue, you’ll need to remove and replace this grease.
You’ll need to first locate the shift motor, which is located on the left of the ATV just below the seat, and directly ahead of the angle sensor.
It is usually white in color and connects to a cable that runs to the front of the ATV. Once located, you’ll need to detach it.
To do this, remove the 10 mm bolts that hold it in place. Then unplug it from the electrical connector and it should come right off.
Once removed, inspect the hearts of the shift motor, being careful not to disturb their position.
You’ll probably find a bit of gummed up grease on the gears, which can be removed using paint thinner or some other solvent.
Once you’ve cleaned out all of the gummed up grease, replace it with a good amount of White Lithium grease.
Note that you do not need to disassemble the shift motor to inspect and clean the gears.
You can then reinstall the shift motor and gears back onto the engine.
Testing & Replacing The Shift Motor
You can also test the shift motor using a multimeter to measure whether it’s still functional.
If the reading shows that it’s not, you’ll need to replace it with a new shift motor, which will likely run you somewhere around $200.
Conclusion
For those experiencing the quite common Honda Rancher 420 electric shift problems, you’ll likely need to either replace the angle sensor or give the shift motor a good cleaning to alleviate them.
Occasionally you may just need to replace the shift motor if it’s gone bad.
Doing so should clear up your electric shift issues.
Before you go, check out the following guides: